How to Adjust the Inner Burr on a Breville Grinder for a More Precise Grind
By the Grindset team · June 8, 2026 · 6 min read
Why the Inner Burr Adjustment Exists
Most Breville grinders ship from the factory with the inner burr set to a middle position, which is a reasonable compromise for a wide range of users but not necessarily the right starting point for your specific burr set, your espresso machine, or your workflow. The outer grind dial handles your day-to-day adjustments, moving the upper burr carrier in small increments relative to the lower burr. But that outer dial has a fixed range, and if your espresso is consistently too coarse even at the finest outer setting, or too fine even at the coarsest, the inner burr adjustment is how you recalibrate the entire range of the grinder to suit your needs.
Think of it as a coarse offset that shifts the whole grind range up or down, while the outer dial gives you fine control within that range. This two-stage system is common across many grinder designs, not just Breville. The inner adjustment moves the lower burr carrier, changing the baseline distance between the two burrs. Once you set it, you leave it alone and use the outer dial for everything else.
Which Breville Grinders Have an Adjustable Inner Burr
The inner burr adjustment is present on most of Breville's conical burr grinders, including the Smart Grinder Pro (BCG820), the Barista Express (BCG850, built into the machine), the Barista Pro, and the Dose Control Pro. The exact mechanism differs slightly between models. On the Smart Grinder Pro and similar standalone grinders, you access the inner burr by removing the hopper, pulling out the upper burr carrier, and finding the lower burr sitting in a stepped plastic collar with numbered positions, typically 1 through 10 or similar. On the Barista Express, the inner burr is accessible once you remove the bean hopper, and it operates on the same stepped-collar principle.
Before you start, confirm which model you have and check whether Breville has published a service diagram for it. The adjustment process is not destructive if done carefully, but understanding the specific collar design on your model will save you from forcing anything.
What You Will Need
- A clean, dry workspace with good lighting
- A small flathead screwdriver (for some collar designs) or just your fingers
- A marker or piece of tape to note your current inner burr position before moving it
- A scale accurate to 0.1 grams
- A shot timer or the timer on your espresso machine
- Enough coffee to pull several calibration shots, typically 5 to 10 doses
Step-by-Step: Adjusting the Inner Burr
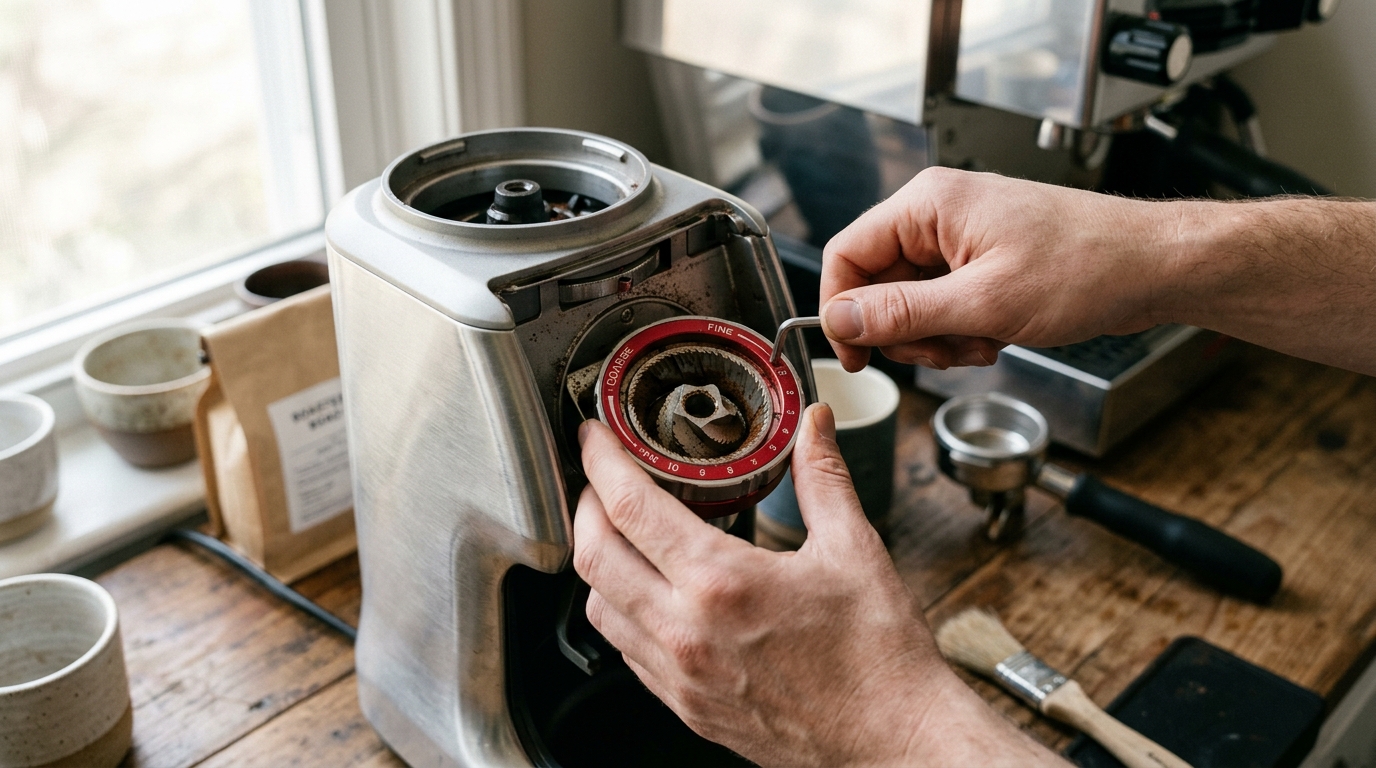
Start by setting your outer grind dial to the middle of its range, something like position 15 on a 30-step dial. This gives you headroom to move in either direction after the inner adjustment. Then power off the grinder, remove the hopper, and pull the upper burr straight up and out. Most Breville upper burrs are held magnetically or by a simple twist-lock. Set the upper burr aside on a clean surface.
With the upper burr removed, you will see the lower burr sitting inside a stepped collar. The collar has numbered positions arranged in a circle, and a small tab or notch on the lower burr carrier aligns with one of these positions. Note your current position before moving anything. Mark it. If the grinder came from the factory at position 7, for example, you want to know that before you change it.
To shift the inner burr, lift the lower burr slightly, rotate the collar to the new position, and seat the lower burr back down so the tab locks into the new notch. Each step on the collar represents a meaningful shift in the total grind range, often equivalent to several steps on the outer dial. Moving one position finer on the inner collar will make every outer dial setting produce a finer grind across the board. Moving one position coarser does the opposite.
Reinstall the upper burr, replace the hopper, and run a small purge of about 5 to 8 grams through the grinder before pulling any calibration shots. Residual grinds from before the adjustment will mix with fresh grinds otherwise, and your first few shots will not reflect the new setting accurately.
Dialing In After the Adjustment
After purging, pull a shot using your standard recipe. A reasonable starting point for espresso is 18 grams in, targeting 36 to 38 grams out in 25 to 30 seconds at around 200 degrees Fahrenheit (93 degrees Celsius). If your shot is running long, say 40 or more seconds for the same output weight, the grind is too fine and you need to move the outer dial coarser. If it is running short at under 20 seconds, the grind is too coarse. The inner burr adjustment should have already moved you into a more workable range, so the outer dial should now have room to get you to the right extraction.
If you find that you are sitting at one extreme of the outer dial again after the inner adjustment, move the inner collar by one more position in the appropriate direction and repeat the purge and calibration process. It usually takes no more than two inner adjustments to find a position where the outer dial has useful range on both sides of your target grind setting.
When This Adjustment Actually Matters
The inner burr adjustment matters most in a few specific situations. First, if you have replaced or seasoned a new burr set. New burrs often require 5 to 10 kilograms of coffee to reach their full cutting efficiency, and as they season, the effective grind size at any given setting changes. What worked on position 8 with a fresh burr may need to shift to position 6 after seasoning. Second, if you have switched to a significantly different coffee, such as moving from a light roast requiring much finer grinds to a dark roast that chokes at the same setting. Third, and most practically, if you bought the grinder used or if it has simply drifted over time as plastic components in the collar wear slightly.
The burr geometry on Breville's 40mm and 54mm conical burr sets is reasonably well-machined for the price point, but the plastic collar system means there is some inherent variability between units. Two Smart Grinder Pros sitting next to each other can have the same outer dial setting but produce noticeably different grind sizes if their inner burrs are at different positions.
Keeping Track of Your Settings
Once you find a good inner burr position, write it down somewhere permanent. If you ever need to disassemble the grinder for cleaning, a task worth doing every 2 to 3 months depending on usage volume, you want to be able to return to the same position without re-dialing from scratch. I log mine in grindset.cafe along with the outer dial position, dose weight, yield, and time for each session, which makes it easy to reconstruct a working recipe after any maintenance.
The inner burr adjustment is one of those features that goes unnoticed until it becomes the only thing standing between you and a consistently well-extracted shot. Once you understand what it controls and how to move it methodically, it stops being intimidating and becomes a straightforward calibration tool.